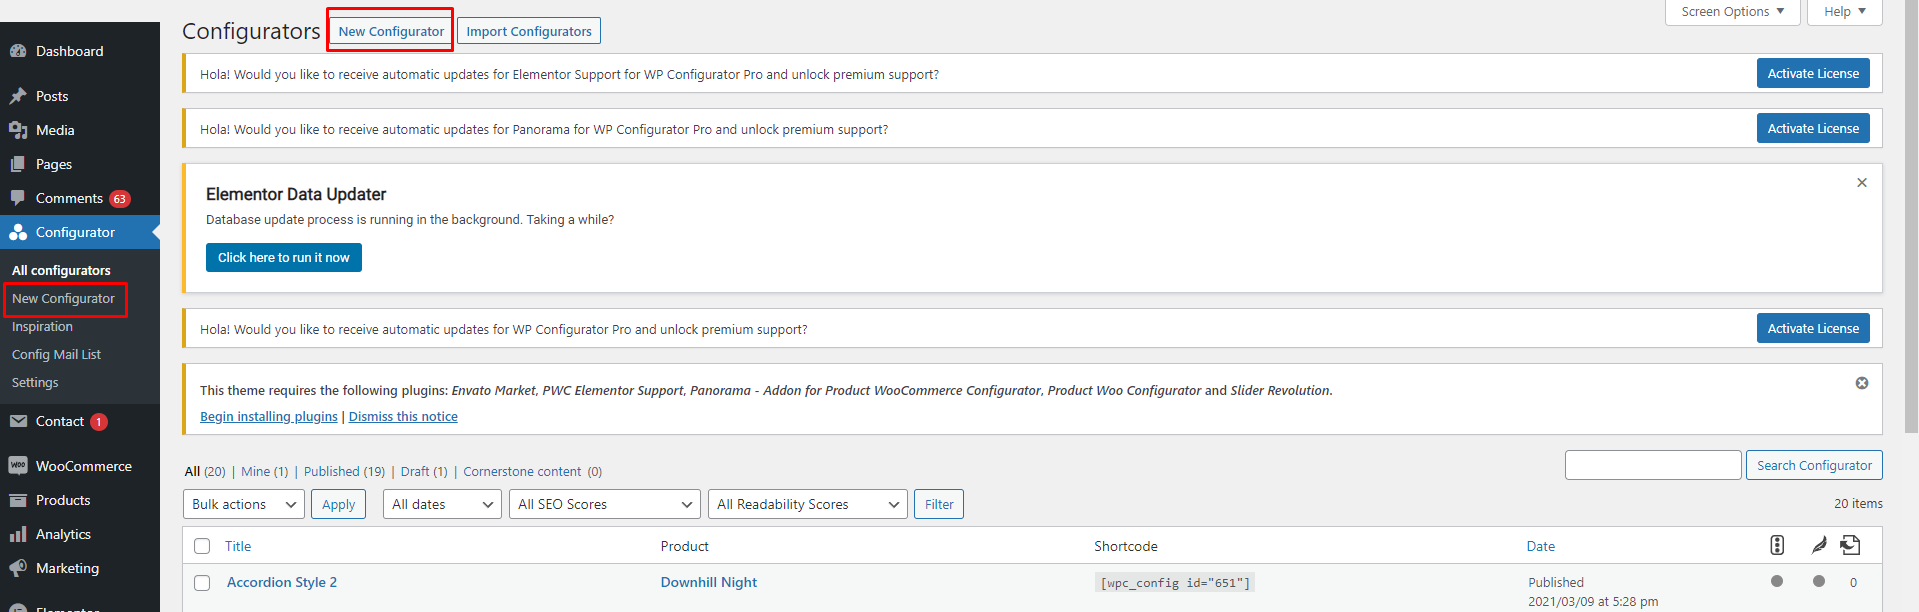
Go to the Configurator Tab on the left of your WordPress Dashboard and click on Configurator then click new configurator. A pop-up will appear where you can enter the Name of the Configurator, Choose your Product, and even Choose Style for your Configurator.
The same way that you assigned the Configuration to your product, you need to do here as well as mentioned here: https://documentation.wpconfigurator.com/documentation/creating-the-actual-product/
Now that you have put all the required information, then the next step is to Create a Configuration for your product.
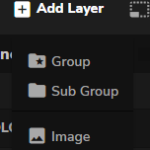
When adding the group layer, you must hover the “+ Add Layer” option on the top header of the configurator editor and you will notice there are choices for group layer, sub-group layer, and image.
Click the “Group” then rename it as Base Color (this is only an example). On the right corner of your editor, there are some settings you should consider reviewing and adding details under Group Layer. Here are some explanations for every option:
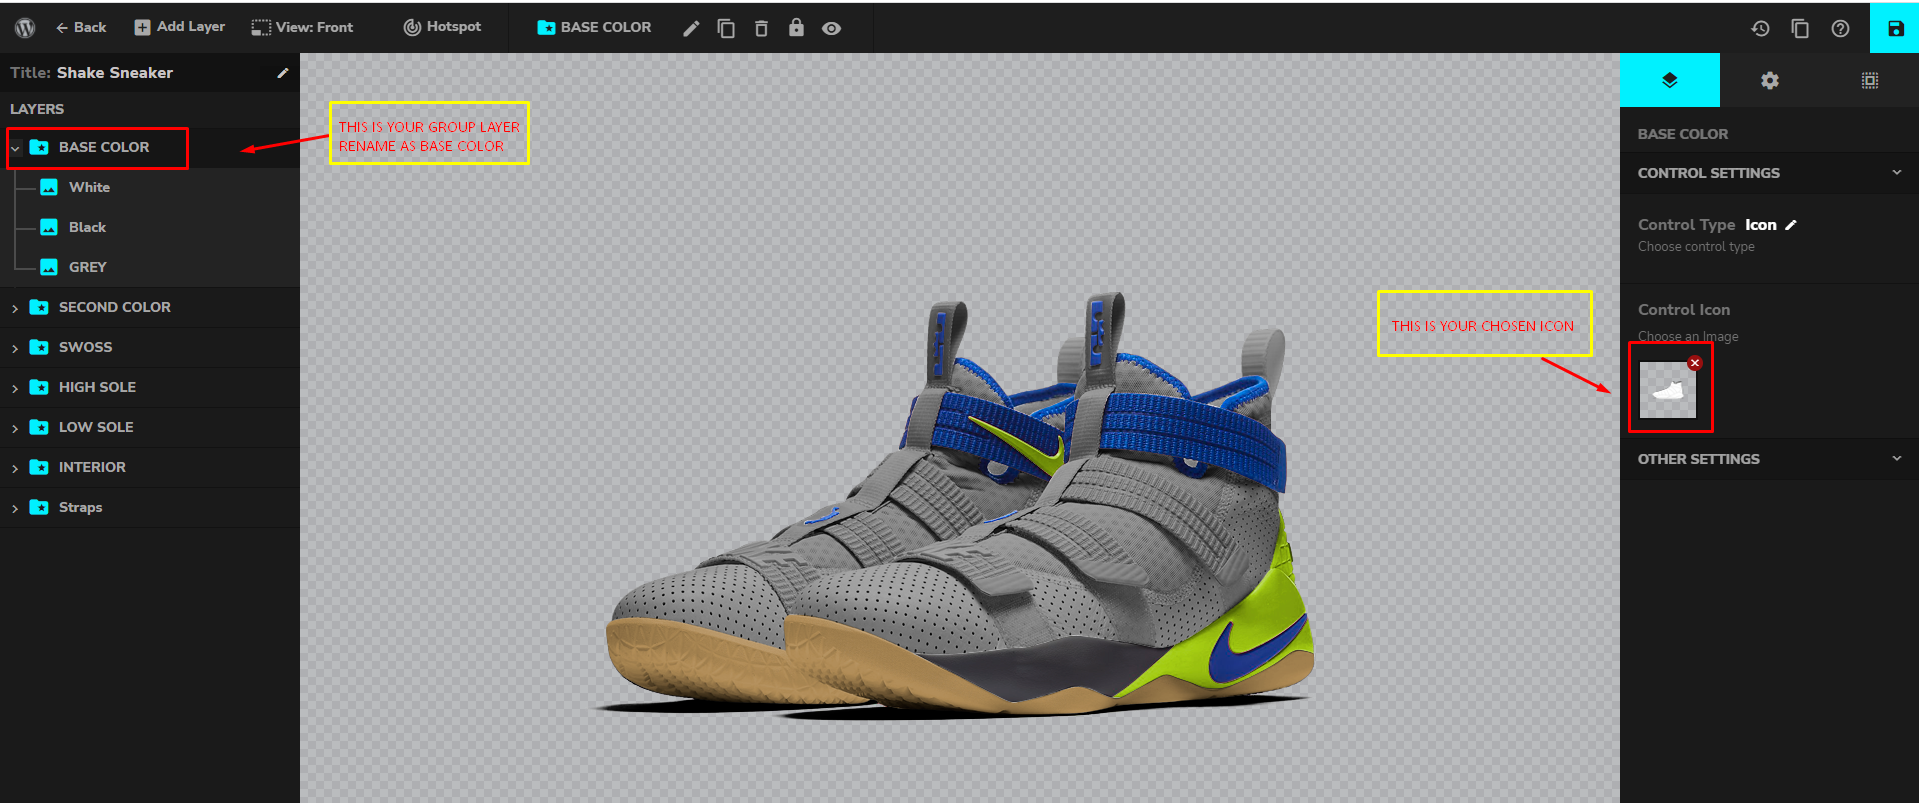
- Control Settings – Select which type of control you want to use. There are colors, Label and icons that can represent your Group Layer on Front-end. For this product, we will be choosing the Icons since we have an image for each group layer.
-
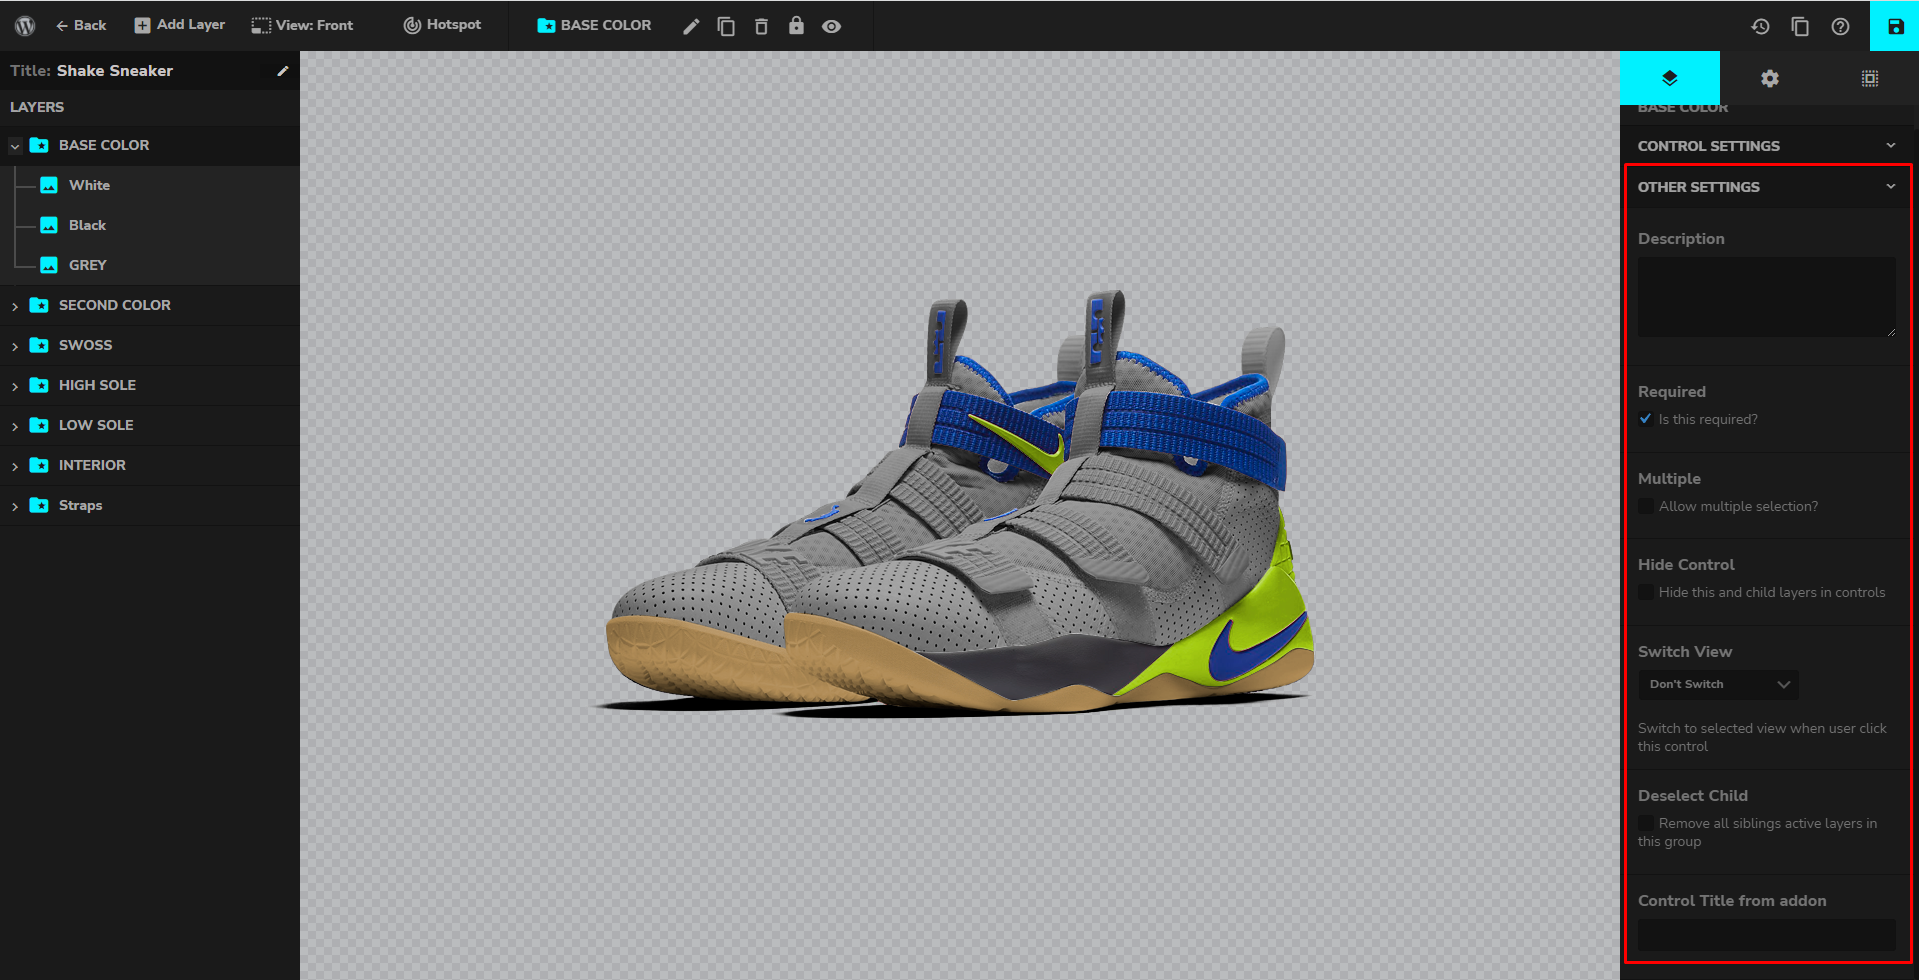
Other Settings – There are lots of options that belong to the other settings that can be modified.
- Description – you can add any description for your group layer.
- Required Option – This option must be enabled for the group layer category because these parts like base color, sole, strap are needed to create sunglasses.
- Multiple – You can allow this to have multiple selections.
- Hide Control – You can hide this and child layers in controls.
- Switch View – Switch to the selected view when the user clicks this control.
- Deselect Child – Remove all sibling’s active layers in this group. If you have a variant of colors like for example (DARK(red, military green, gray, black) LIGHT(white, yellow, blue) TEXTURE(Snake, Camouflage)) and you want that your customer/client will only choose one color among all of the colors. This feature will work only if you have enabled the deselect child on the parent layer.
- Control Title from addon – This is a new feature added where you can enter a short title
After you added a Group Layer, let us now add the sub-group. The subgroup is similar to the old version’s parent layer.
When adding the sub-group layer, you must hover the “+ Add Layer” option on the top header of the configurator editor and you will notice there are choices for group layer, sub-group layer, and image.
You can choose a sub-group layer if you have one or more layers under it. For example, you want to categorize the colors of the Base Color (Group Layer) into Light and Dark. So you will be setting/renaming your sub-group layer as Light. So for this kind of product, we won’t be needing to categorize the colors or we won’t be needing to use the sub-group. We will be using the Image instead.
Now let’s click the “Image” then rename it as White. And don’t forget to enable the Active on Load to set the default product to load. Please see the complete tutorial for the full Configurator creation:
On the right corner of your editor, there are some settings you should consider reviewing and adding details under Subgroup and Image Layer. Here are some explanations for every option:
- Layer Type – Switching layer between sub-group and image is now made easy.

As you can see on the image, there are 3 slots to be filled. That is what you called Views (Front, Lateral, Bottom) and that can be added on the top header of the editor.
Control settings & Other Settings for both Subgroup and Image is the same options from the Group Layer. However, some of the Other Settings have a little bit of difference since the price input, and active on load option is added.
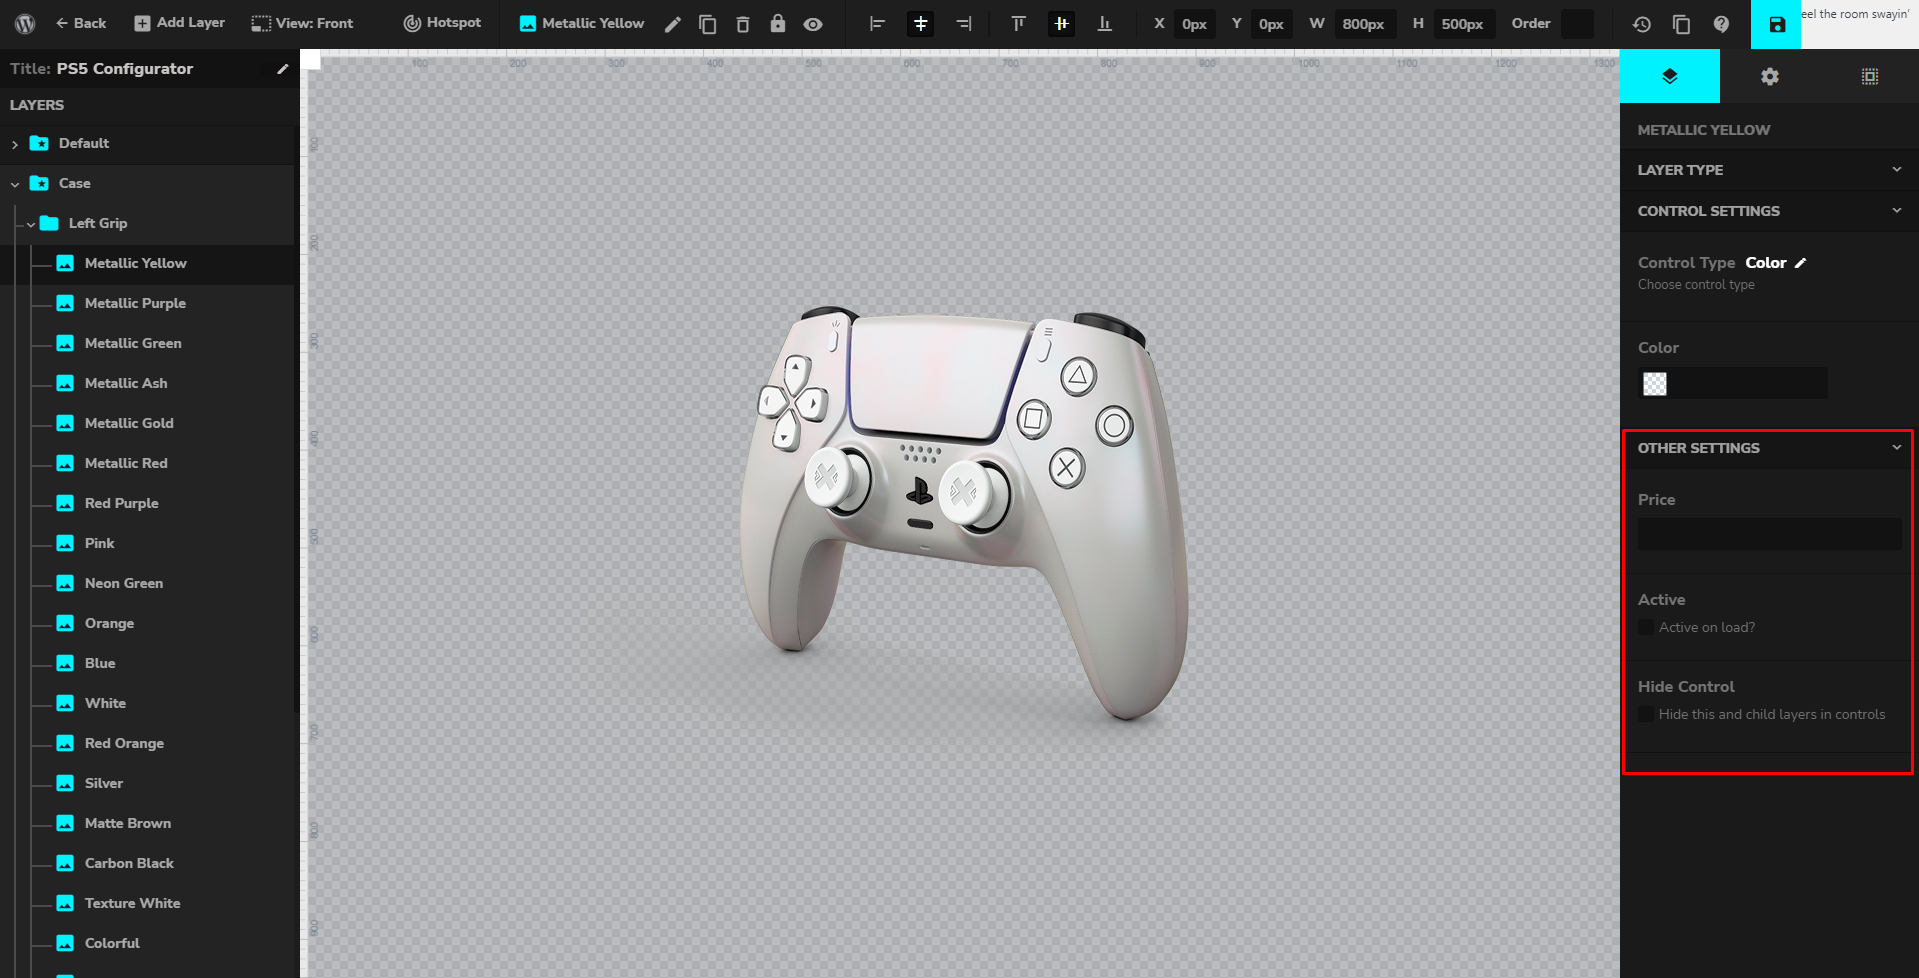
- PRICE – This option is applicable to the parent layer option and will take effect only for the parent layer on the front end. You can leave it blank.
- ACTIVE ON LOAD – This means that this layer or the product image will be displayed on site load.