Turn Photoshop Designs Into Dynamic Product Configurators
Create fully interactive, customizable WooCommerce products by turning layered Photoshop designs into real-time configurators using WP Configurator.

Why Layers Are the Secret to Custom Product Success
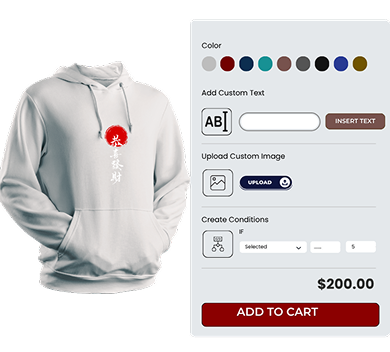
Every color, texture, and feature your customers want -controlled instantly. Layers allow users to personalize products in real time, giving them full control over presentation and functionality.

Visual Precision
Show every detail exactly as you designed it-clean, aligned, and pixel-perfect.

Unlimited Options
Offer multiple colors, patterns, or styles with a single image set.

Speed & Efficiency
Design once in Photoshop, export the layers, and deploy instantly in WP Configurator.
Visual Precision
Show every detail exactly as you designed it-clean, aligned, and pixel-perfect.
Unlimited Options
Offer multiple colors, patterns, or styles with a single image set.
Speed & Efficiency
Design once in Photoshop, export the layers, and deploy instantly in WP Configurator.
Ready to Launch Your First Custom Product?
Whether you’re building custom apparel, tech gear, shoes, or furniture. WP Configurator and Photoshop give you the freedom to design, customize, and sell faster.
Start creating layered products today and give your customers the interactive shopping experience they expect.
Design Smarter in Photoshop
To get the best results in WP Configurator, start by building clean, organized layers in Photoshop.
Here’s how:
-

Open your product image in Photoshop.
-
Use the Pen Tool or Lasso Tool to isolate product parts (e.g., base, strap, logo).
-
Place each part on a separate layer.
-
Name layers clearly (e.g., base-blue.png, sole-black.png).
-
Keep the canvas size consistent across all layers (e.g., 1000x1000px).
-
Export each layer as a transparent PNG or WebP file.
Pro Tip: Use Layer Masks and Hue/Saturation Adjustment Layers to create multiple color variations without duplicating your entire design.
Bring Layers to Life in WP Configurator
Once your layered images are ready, it’s time to build your product configurator.
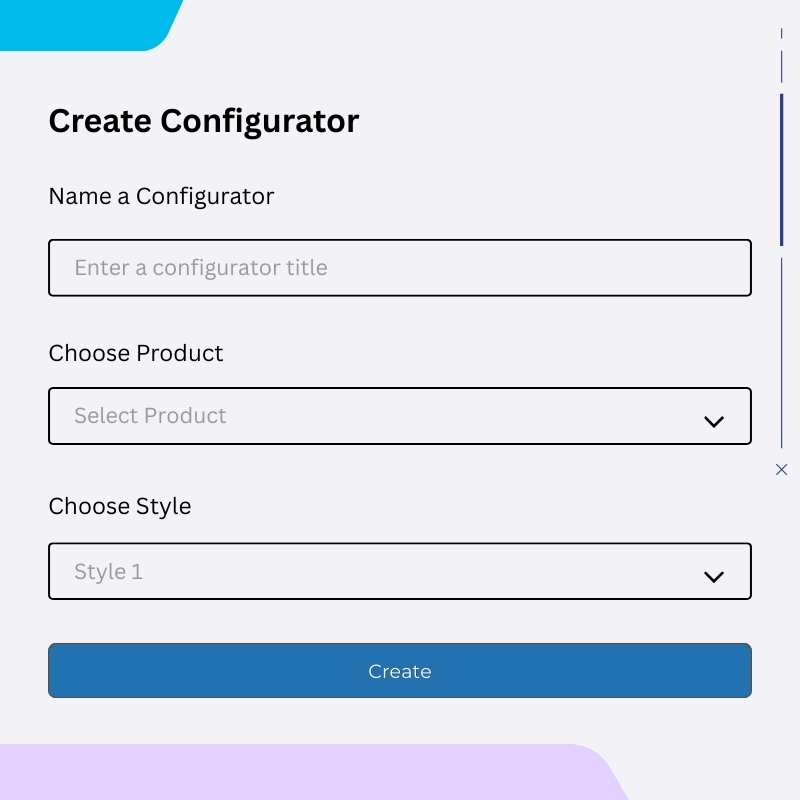
Create Configurator
Create a new configurator in the WP Configurator dashboard
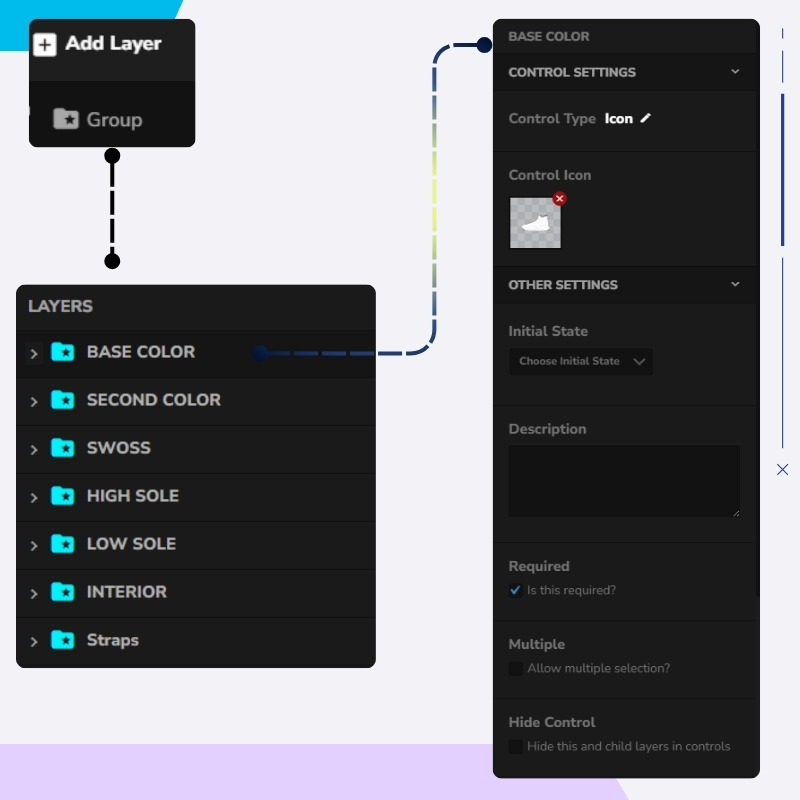
Add Layer Groups
Add Group Layers like “Base Color”, “Material”, “Logo”, etc
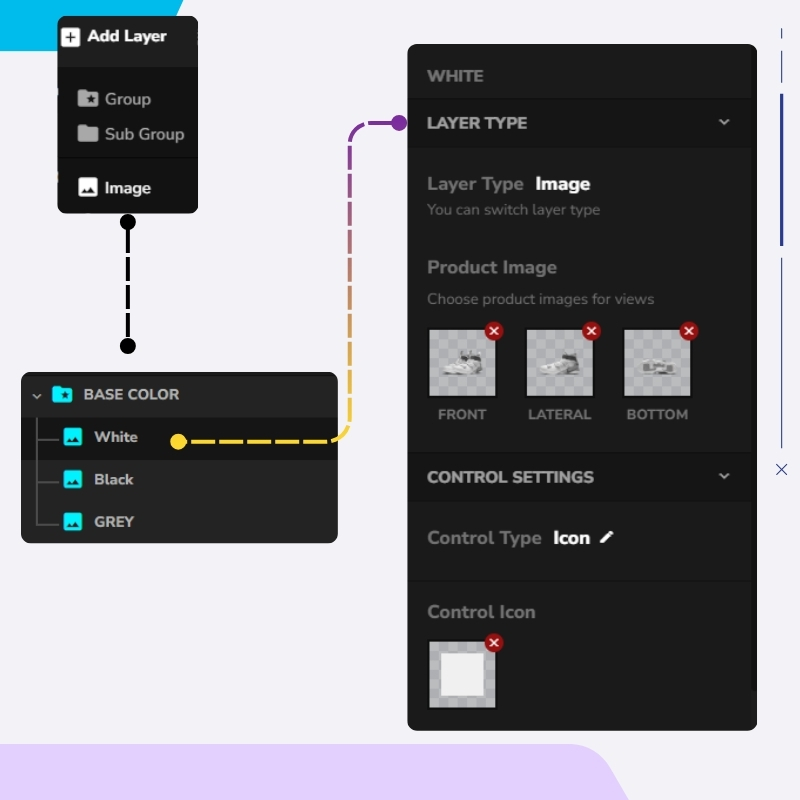
Upload Image Layers
Upload each PNG/WebP image as an Image Layer inside the correct group
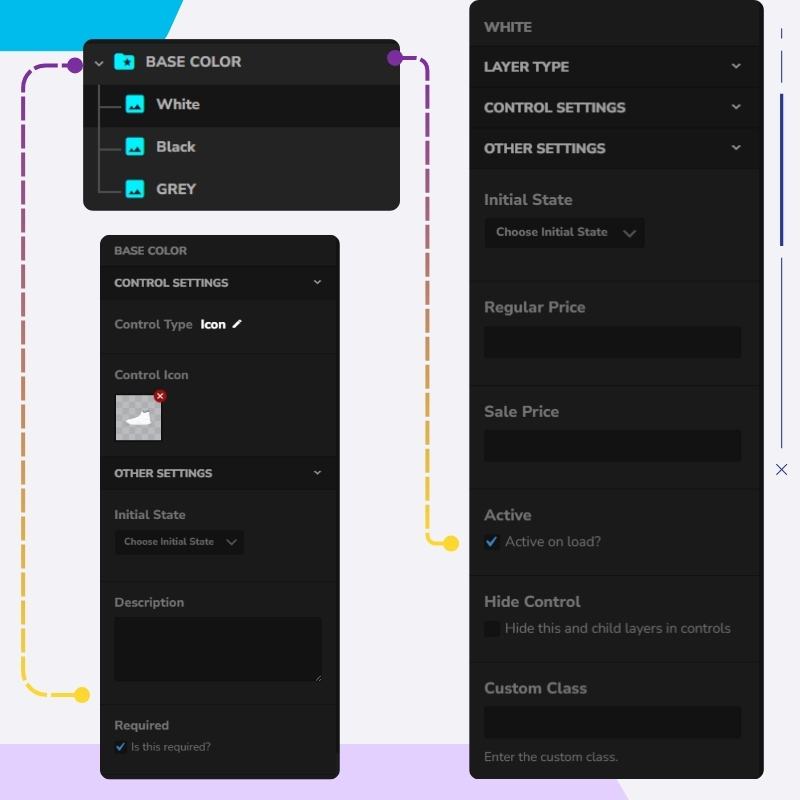
Set Default Layer
Set one layer as “Active on Load” to display by default
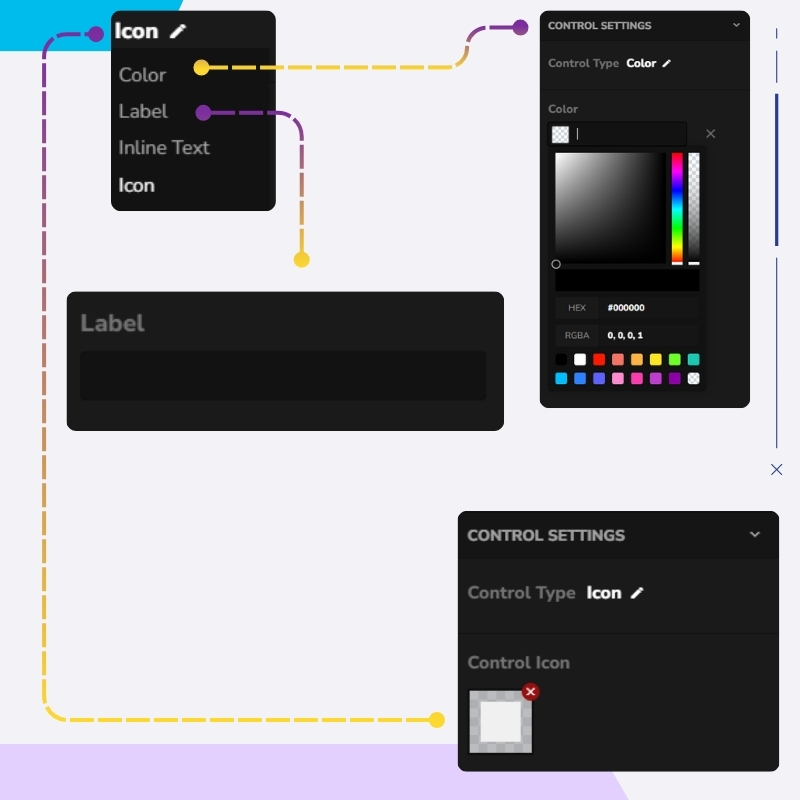
Customize Controls
Configure the control style (color swatch, icon, label)
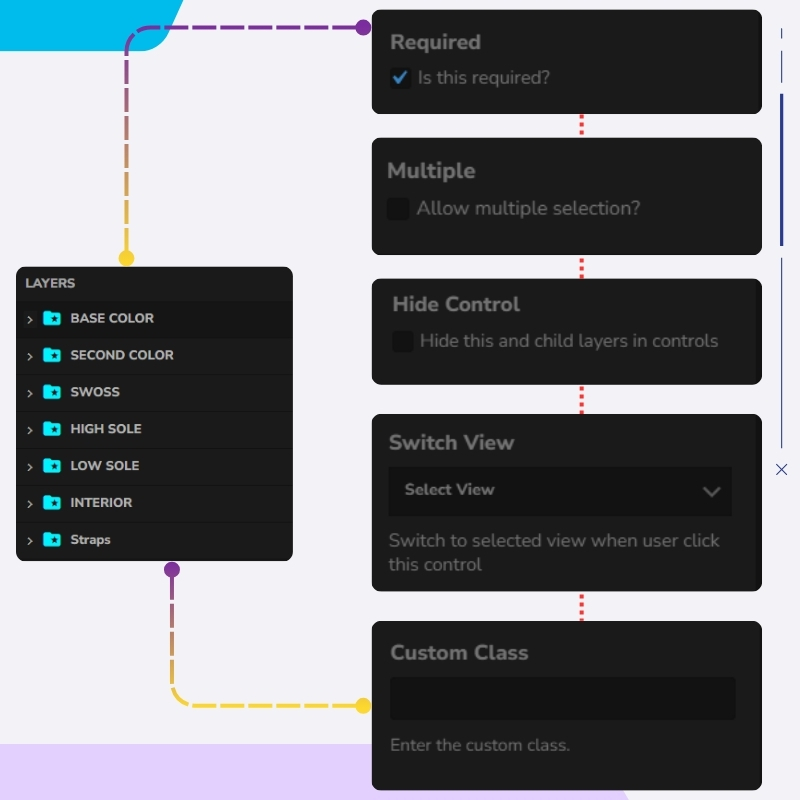
Configure Rules & Views
Set multiple selection rules, view-switching options, and other controls
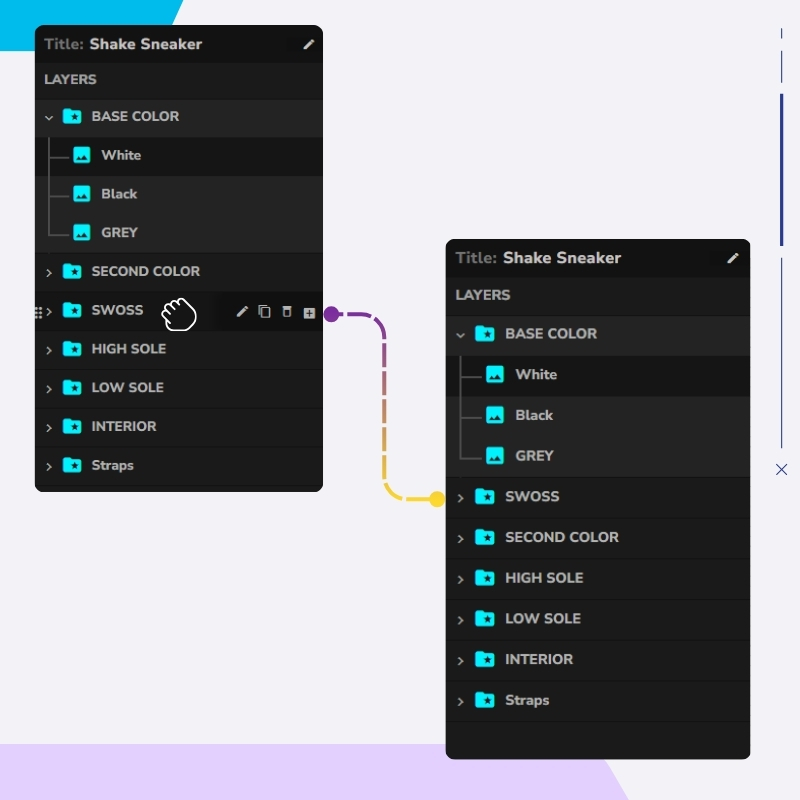
Arrange Layer Order
Drag and drop layers to manage their visual stacking order
Create Configurator
Create a new configurator in the WP Configurator dashboard
Add Layer Groups
Add Group Layers like “Base Color”, “Material”, “Logo”, etc
Upload Image Layers
Upload each PNG/WebP image as an Image Layer inside the correct group
Set Default Layer
Set one layer as “Active on Load” to display by default
Customize Controls
Configure the control style (color swatch, icon, label)
Configure Rules & Views
Set multiple selection rules, view-switching options, and other controls
Arrange Layer Order
Drag and drop layers to manage their visual stacking order
Optimize for Speed, SEO & User Experience

Optimized Image Formats
Use compressed PNG or WebP images for faster load times

Descriptive File Naming
Name files and layers descriptively (e.g. backpack-red-leather.png)

Alt Text for Accessibility
Add alt text for every image layer to improve accessibility and SEO

Consistent Canvas Alignment
Ensure all images are perfectly aligned using the same canvas size.

Optimized File Size Limits
Keep file sizes small (ideally under 300KB per image).
Optimized Image Formats
Use compressed PNG or WebP images for faster load times
Descriptive File Naming
Name files and layers descriptively (e.g. backpack-red-leather.png)
Alt Text for Accessibility
Add alt text for every image layer to improve accessibility and SEO
Consistent Canvas Alignment
Ensure all images are perfectly aligned using the same canvas size.
Descriptive File Naming
Name files and layers descriptively (e.g. backpack-red-leather.png)

100% No-Risk Money Back Guarantee
You are fully protected by our 100% Money Back Guarantee. If you aren’t completely satisfied within 15 days of purchase, you’re more than welcome to a full refund.
Frequently Asked Questions
My layers aren’t aligning properly
Make sure all exported layers share the same canvas size and positioning.
How do I ensure only one selection per group?
In each group’s settings, disable “Multiple” and enable “Deselect Child.”
I want a default layer that always appears
Upload it as a base layer, mark it “Active on Load,” and don’t assign selection controls.